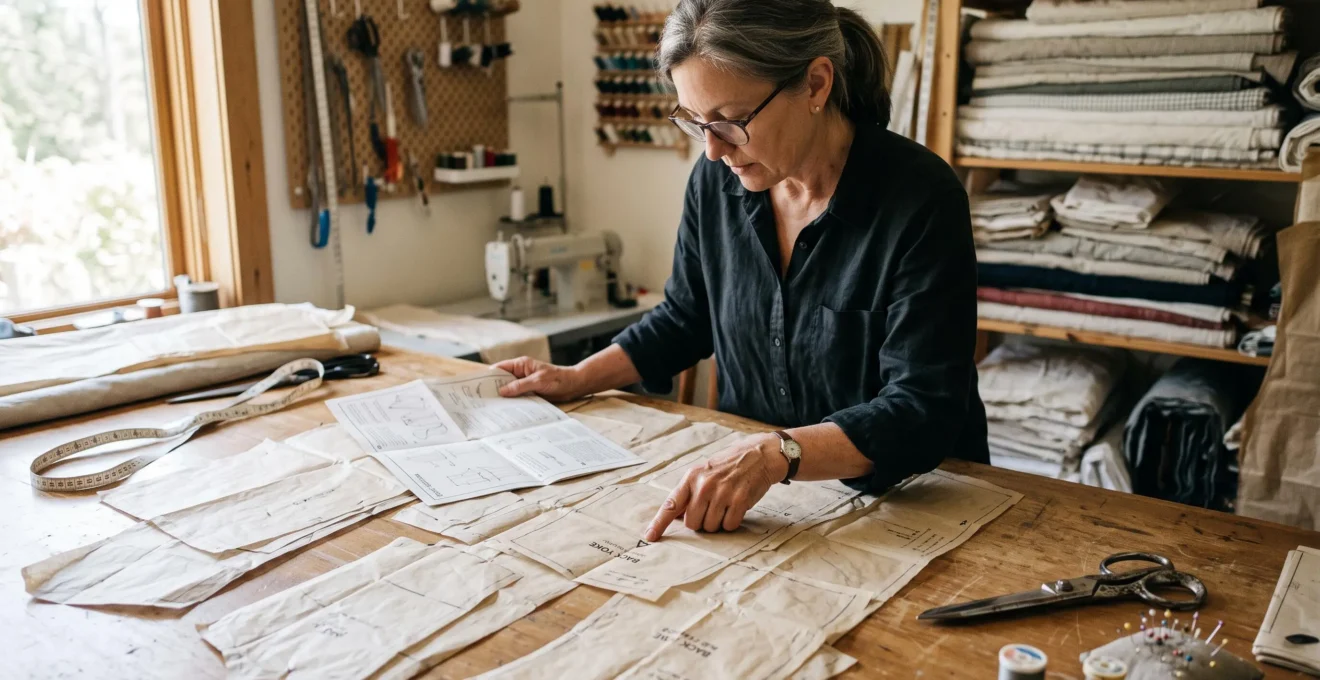
Complex paper sewing patterns become manageable when every piece, marking and fitting decision is checked before expensive fabric is cut. The safest approach is to understand the pattern’s construction, compare its measurements with your body, test uncertain areas in a toile and verify the grainline before cutting.
A fitted jacket, panelled dress or tailored pair of trousers may require considerably more preparation than a simple skirt. Each additional seam creates another alignment point, while inaccurate cutting can affect several connected pieces. However, a pattern containing more than 20 pieces is not necessarily difficult to sew. Some pieces shape the garment; others simply provide linings, facings or pockets.
For a home sewist moving into advanced garments, the goal is not to eliminate every possible mistake. It is to identify the decisions that would be expensive to reverse and test them while corrections are still straightforward. This method protects your fabric without turning every project into an unnecessarily lengthy exercise.
Complex sewing patterns: the essential rules
- Read the complete pattern guide, identify fit-critical pieces and check finished garment measurements before cutting.
- Use a targeted toile to test unfamiliar shaping, then transfer confirmed adjustments to the paper pattern.
- Verify printing scale, grainlines, matching points and assembly order before making irreversible cuts or seams.
- Why Do Some Patterns Have 20+ Pieces When the Garment Looks Simple?
- How to Test a Complex Pattern With a Toile So You Don’t Ruin Expensive Fabric?
- PDF or Paper Pattern: Which Is Less Likely to Cause Fit Errors on Advanced Designs?
- The Cutting Mistake That Warps an Entire Bodice Even If You Sew Perfectly
- In What Order Should You Assemble a Complex Pattern So You Don’t Unpick for Hours?
- Why Does a 1 cm Pattern Change Fix a Fit Issue That “Sizing Up” Can’t?
- How to Build a Day-to-Night Outfit Using Two Switch Pieces in Under 5 Minutes?
- Which Pattern-Making Skills Give the Fastest Fit Improvement After 4 Weeks of Practice?
Why Do Some Patterns Have 20+ Pieces When the Garment Looks Simple?
A garment can look simple while requiring more than 20 pattern pieces because its internal construction is more complicated than its appearance suggests. Separate panels shape the body, control fabric grain, support curved seams or create linings and facings. Understanding these functions makes it easier to distinguish essential fitting pieces from supporting components.
Consider a fitted dress with princess seams. Its front bodice may be divided into central and side panels rather than one large piece with darts. That division allows shaping to follow the body’s contours. A lined version may repeat these components in lining fabric, adding several pieces without changing the dress’s exterior.
The number of tissue pieces therefore reflects both garment engineering and the designer’s method of presenting the pattern. One designer may use a separate facing; another may incorporate the same function into a lining. Some pattern ranges also include alternative pieces for different garment views or fitting options.
Sort the pieces by function before attempting to understand the entire construction sequence:
- Fit-critical pieces: bodice panels, shaped waist sections, trouser fronts and backs, and other components that establish body dimensions and balance.
- Structural pieces: collars, cuffs, facings, waistbands and interfacing that support shape or finish edges.
- Functional or optional pieces: pocket bags, decorative tabs and alternative design features that may not determine the garment’s main fit.
This classification does not mean that structural pieces can be cut carelessly. A collar or facing must still match its corresponding seamline. It means that your fitting checks should begin with the pieces establishing the garment’s overall shape.
Before handling your final fabric, establish a ten-minute pattern-reading routine:
- Read the pattern’s piece inventory and match it against the physical pieces provided.
- Identify the cutting layout for your garment view, size and fabric width.
- Locate grainline arrows, notches, fold indicators, darts and other construction symbols.
- Read the assembly instructions from beginning to end, noting unfamiliar operations.
Pay particular attention to pieces marked for cutting on the fold, curved sections requiring precise matching and pieces that share important construction points. These deserve a dry-run layout because an incorrectly positioned piece may leave insufficient fabric for a replacement.
Lay the paper pieces over the uncut fabric, respecting grainlines and directional requirements, before deciding whether the proposed arrangement is practical.
Once the pieces have clear functions, the pattern becomes a sequence of manageable fitting and construction decisions. The next question is which of those decisions should be tested before cutting the garment fabric.
How to Test a Complex Pattern With a Toile So You Don’t Ruin Expensive Fabric?
Test a complex pattern with a toile by sewing the sections most likely to reveal fitting problems before cutting your expensive fabric. Prioritise shoulders, shaped bodice seams, armholes and trouser crotch curves when relevant. Choose inexpensive fabric with handling characteristics similar to the final material, and transfer successful fitting corrections back to the paper pattern.
A toile is a trial version of a garment, often made from calico or another affordable fabric. It allows you to examine proportions and movement without committing the intended fabric.
Suppose you intend to make a tailored dress from fabric costing £40 per metre. That figure is a hypothetical material price, not a typical market price. The important decision is whether the cost and uncertainty of the finished garment justify a preliminary test.
For an unfamiliar fitted design, testing the bodice first may reveal whether the shoulders, bust shaping, waist placement and armholes work together.
A partial toile is useful when the uncertain fit areas can be tested independently. For a sleeveless fitted bodice, this may mean constructing the front, back and side seams without finishing the neckline or hem. For trousers, the waist, seat and crotch curve usually need to be assessed together.
However, omitting a sleeve is not always appropriate. Sleeve shape, armhole dimensions and shoulder balance interact. If the final garment has a close-fitting sleeve, test it rather than assuming a comfortable sleeveless bodice guarantees adequate mobility.
Similarly, a dress with a fitted waist may need enough of the skirt attached to show how its weight affects the bodice.
Fabric choice matters. In Seamwork‘s article on making the most of a muslin toile, Trudy Williams explains why a substitute should resemble the intended material’s hand and drape. A stiff cotton toile may not represent the behaviour of a fluid fabric, while a woven toile cannot reliably reproduce the stretch of a knitted garment.
Once the test garment is fitted, mark the adjustments directly on the toile. Record the location, direction and size of each alteration. Then transfer the confirmed changes to a traced or copied paper pattern, redrawing affected seamlines and checking neighbouring pieces.
The toile is the diagnostic garment; the corrected paper is the reusable record. Keeping both makes later adjustments easier to understand.
A complete toile is especially valuable for unfamiliar designers, unusual silhouettes or expensive materials. When a familiar pattern already fits well, a measurement check or selective test may be sufficient.
A successful toile reduces avoidable fitting surprises, but its accuracy still depends on the underlying pattern. For digital patterns, that includes verifying the printed scale and assembly.
PDF or Paper Pattern: Which Is Less Likely to Cause Fit Errors on Advanced Designs?
Neither PDF nor commercially printed paper patterns are inherently more accurate for advanced garments. Fit errors depend on printing scale, page assembly, tracing, cutting and the pattern’s original measurements. A correctly printed PDF can be accurate, but tiled home printing introduces joins that must be checked. Large-format printing avoids most page assembly work.
For a simple skirt, a slightly misaligned tiled page may be easy to notice. On a multi-panel bodice, an unnoticed shift at a page join can interrupt a curved seamline or separate matching marks that should correspond.
The practical question is therefore not simply which medium is better, but which process introduces fewer opportunities for mistakes in your working environment.
| Consideration | Tiled PDF pattern | Printed paper or large-format pattern |
|---|---|---|
| Initial preparation | Requires printing, trimming or joining pages according to the designer’s instructions. | Usually avoids home page assembly; may still require tracing or cutting. |
| Scale verification | Requires checking the printed calibration square. | Large-format PDF prints also require scale verification; commercial tissue should be checked against relevant pattern measurements. |
| Complex curved pieces | Page joins must preserve continuous seamlines and matching marks. | No tiled joins when printed as continuous pieces, but tracing and handling still require care. |
| Future adjustments | Digital originals can be reprinted; assembled sheets may be retraced. | Pieces can be traced and altered while preserving the original pattern. |
| Convenience | Immediate digital access, subject to printing equipment. | Less assembly for ready-printed pieces; physical purchase or printing service may be needed. |
For home-printed PDFs, begin by selecting the intended paper format, commonly A4 in the UK, and printing at actual size. Do not assume a printer’s default settings preserve scale.
Follow Seamwork’s PDF pattern printing instructions: print the calibration page first, measure the test square, and assemble the remaining pages using the provided alignment marks.
During assembly, check that seamlines, grainlines and notches continue correctly across adjoining sheets. Keep pages flat while joining them; avoid forcing paper into alignment if the printed marks disagree.
For patterns with numerous shaped panels, an A0 or other compatible large-format print may be a convenient alternative if the designer supplies an appropriate file. This reduces page joining but does not remove the need for scale checks.
When making repeated alterations, tracing a fresh working copy can help preserve the original pattern, whether it was supplied digitally or on tissue paper.
Once the pattern has been checked, the next significant risk moves from paper to fabric: whether each piece is positioned on the correct grain.
The Cutting Mistake That Warps an Entire Bodice Even If You Sew Perfectly
Cutting bodice panels off-grain can distort the finished garment even when every seam is sewn accurately. The grainline determines how woven fabric hangs, stretches and responds to movement. When related panels are cut at unintended angles, their behaviour can differ, producing twisting or uneven drape that precise stitching alone cannot reliably correct.
A garment panel may appear correctly shaped on the cutting table while behaving differently once it hangs from the shoulders. Woven fabrics generally respond differently along the lengthwise grain, crosswise grain and bias.
Designers use these directions deliberately. A bias-cut panel, for example, is supposed to behave differently from a straight-grain panel. The mistake is not cutting at an angle; it is ignoring the grainline specified for that piece.
Before positioning your pattern, prepare the fabric according to its care requirements. Allow it to settle flat after washing, drying and pressing. Check for distortion in the fabric’s weave, and avoid pulling the material into an artificially straight position.
The selvedge is a useful reference for lengthwise grain, although it should not be assumed to guarantee that the entire fabric is perfectly squared.
A practical alignment check is to measure from both ends of the printed grainline arrow to the same straight reference edge. Equal distances show that the arrow runs parallel to that edge. This method is explained in Seamwork’s fabric cutting and marking tutorial.
For asymmetric garments, cutting in a single layer can make piece orientation easier to inspect. However, single-layer cutting is not automatically foolproof. Pieces requiring a left and right version must still be reversed appropriately, according to the pattern instructions.
Five checks before cutting expensive fabric
- Confirm fabric preparation: record whether the fabric has been treated according to its intended care method and is lying flat without tension.
- Verify every grainline: measure from both ends of each grainline arrow to the same reference edge; leave the verified pieces correctly positioned.
- Audit piece orientation: mark the cutting plan with the required number of each piece, including folds, mirrored pairs and asymmetric components.
- Check directional requirements: verify that pieces follow any specified nap, pile or directional-print layout; keep the approved arrangement visible.
- Prepare construction markings: identify notches, dart positions and matching points, then transfer the required markings before removing the pattern pieces.
If a piece has already been cut off-grain, assess the distortion before assembling it. Gentle pressing may help release handling distortion, but it cannot reliably correct a genuinely incorrect cutting direction.
There is no universal angular tolerance at which steaming becomes safe or recutting becomes mandatory. The decision depends on the fabric, panel shape, intended grain and observed behaviour. Where a critical panel continues twisting or cannot align correctly, recutting is generally the safer option.
Before abandoning the project, review the remaining fabric for an alternative layout that still respects grain direction and any pattern matching requirements.
Accurately cut pieces provide the foundation for good construction. The remaining challenge is joining them in an order that allows mistakes to be found before they become difficult to undo.
In What Order Should You Assemble a Complex Pattern So You Don’t Unpick for Hours?
Assemble a complex garment by following its construction instructions while introducing temporary fitting checks before difficult-to-reverse operations. Establish the main shaping, verify important seam intersections and test the fit before permanently finishing or enclosing critical seams. Do not automatically postpone collars, sleeves, pockets or closures: their correct timing depends on how the particular garment is constructed.
Advanced garments often contain operations that depend on earlier steps. A pocket may need to be sewn before the side seam closes. A facing may need to be prepared before a neckline can be finished properly. Reversing these operations can make later construction unnecessarily difficult.
The most useful preparation is to read the instruction sheet as a series of dependencies rather than simply a sequence of numbered tasks.
Identify which steps establish fit, which steps provide temporary access to the garment interior and which steps permanently enclose or trim fabric.
| Operation | Practical approach | Reason |
|---|---|---|
| Initial bodice shaping | Use temporary stitching where practical and check the fit. | Allows adjustments before seams are permanently finished. |
| Princess-seam intersections | Mark seamlines and matching points before stitching. | Helps maintain accurate alignment across curved panels. |
| Side seams | Baste and try on where the design permits. | Preserves opportunities for width and balance adjustments. |
| Interfacing, trimming or clipping | Confirm the relevant fit and construction decisions first. | Some changes are difficult or impossible to reverse cleanly. |
| Facings, collars and closures | Follow the pattern-specific dependency order. | These components may need to be installed before neighbouring seams are closed. |
Matching points deserve as much attention as stitch quality. Transfer notches, seam intersections and other construction marks before the paper is removed. On curved seams, compare the relevant seamlines rather than assuming that raw edges or differently shaped seam allowances should match throughout.
For example, when joining princess-seam panels, align the designated notches and seamline intersections, then distribute the fabric between them without introducing unintended stretching.
Temporary machine basting is particularly useful when assembling fitted areas. It allows a fitting check before overlocking seam allowances, grading bulky seams or committing to a more permanent finish.
However, do not change the manufacturer’s assembly order solely to bring every fitted seam forward. Some garments rely on a precise sequence to preserve access to pockets, collars or concealed fastenings.
Instead, identify fitting checkpoints within the prescribed construction method. If the instructions do not provide one before an important irreversible step, consider whether a temporary assembly can be introduced without disrupting the required sequence.
Once the garment can be tried on, the fitting process becomes more precise. A localised problem often needs a small alteration to the pattern rather than a change to the entire garment size.
Why Does a 1 cm Pattern Change Fix a Fit Issue That “Sizing Up” Can’t?
A 1 cm pattern adjustment can resolve a local fitting problem because it changes only the affected area, while choosing a larger size generally alters several garment dimensions. If a shoulder is too wide but the bust and waist fit correctly, a targeted shoulder adjustment can preserve the successful fit elsewhere. The correct alteration depends on the diagnosed cause.
Commercial sewing patterns are developed around a set of body proportions. Selecting a different size changes the relationship between the pattern and those measurements, but it does not necessarily address an individual difference in shoulder slope, torso length or bust position.
For instance, imagine a hypothetical bodice that fits comfortably through the bust and waist but sits too wide at the shoulders. Increasing the overall size would not logically solve an excess-width problem in that area.
A targeted alteration might instead involve changing the shoulder seam location and adjusting the related armhole and sleeve as necessary. The important principle is to change the smallest connected area capable of correcting the underlying problem.
Diagnose before altering. Wrinkles provide useful clues, but they are not a universal measurement system:
- Horizontal tension lines may suggest insufficient length or circumference, depending on where they appear.
- Vertical folds may indicate excess fabric or distribution problems rather than a simple need for more width.
- Diagonal drag lines may point towards balance, shaping or alignment issues involving more than one garment area.
Look at the direction of tension, compare left and right sides, and check the garment’s movement. Then return to the paper pattern to measure the region involved.
Finished garment measurements are particularly valuable. When measuring paper pieces, exclude seam allowances and account for darts, pleats and other shaping. Compare the result with the relevant body measurement and consider the amount of ease intended by the design.
Wearing ease and design ease serve different purposes. Wearing ease allows movement and comfort; design ease contributes to the intended silhouette. A loose-fitting garment should not automatically be reduced to match body measurements.
A recurring fitting problem across several sizes may indicate that the designer’s underlying pattern block differs from the wearer’s proportions. That is a reason to study targeted adjustments rather than repeatedly changing size without diagnosis.
Make one controlled change, such as a 1 cm alteration where the fitting evidence supports it. Test the result, compare it with the original and then decide whether a further change is necessary. One centimetre is an illustrative adjustment, not a universal correction.
Small, documented pattern alterations help produce garments that are comfortable and consistent. Once the base fit is dependable, those same construction decisions can support more flexible wardrobe designs.
How to Build a Day-to-Night Outfit Using Two Switch Pieces in Under 5 Minutes?
Build a day-to-night outfit around one well-fitted base garment and two interchangeable pieces designed to work with it. Choose layers or sewn accessories that change the outfit’s appearance without requiring alterations, pressing or refastening the base. A five-minute transition is a practical design target, provided the pieces fit comfortably and can be changed easily.
The key decisions happen before sewing, not when preparing to go out. A base dress, for example, can be designed with a simple neckline, comfortable waist and sleeves that allow another layer to sit smoothly over it.
For a hypothetical work-to-evening outfit, consider a fitted, sleeveless woven dress and two coordinated pieces: a lightweight daytime overlayer and a more structured evening jacket. The overlayer provides a practical daytime finish, while the jacket changes the silhouette for an evening setting.
Both pieces should work with the same underlying fit. If the dress has bulky seam allowances around the armholes or an awkwardly positioned closure, adding a fitted jacket may make the outfit uncomfortable.
Plan the interchangeable pieces using three construction criteria:
- Compatible layering: check that shoulder shapes, armholes and seam allowances do not create uncomfortable bulk.
- Simple fastening: choose closures that can be operated quickly without moving or adjusting the base garment.
- Visual coordination: test the intended colours, fabric textures, proportions and overall colour temperature together before cutting.
Reversible components can provide additional options, but only when their seam finishes, closures and fabric properties support use on both sides. A reversible garment usually requires more deliberate finishing than a conventional lined layer.
Hem length also matters. Two interchangeable layers with different proportions can alter how the base garment appears, even though its fit remains unchanged.
Once both switch pieces are finished, test the complete outfit at home. Put on the daytime version, change to the evening version and check whether the swap can be completed comfortably in under five minutes without pins, an iron or assistance.
If the transition requires repeated adjusting, identify the cause. It may be a fastening problem, excess bulk or a mismatch between the base garment and one of the interchangeable pieces.
The five-minute target is a useful personal test rather than a guaranteed outcome for every design or wearer.
Versatility is easiest to achieve when the pattern-reading, cutting and fitting work has already been completed accurately. Those skills can be developed systematically rather than learned all at once.
Key takeaways before your next project
- Measure the pattern and understand its intended ease before deciding that a size or shape is wrong.
- Keep successful fitting changes on a corrected paper copy so future garments benefit from previous tests.
- Prioritise grainline accuracy, matching marks and controlled alterations when progressing to more complex multi-piece designs.
Which Pattern-Making Skills Give the Fastest Fit Improvement After 4 Weeks of Practice?
The most useful early pattern-making skills are accurate body measurement, flat-pattern measurement, ease assessment, grainline checking and targeted fitting alterations. These help identify problems before expensive fabric is cut. A structured four-week practice plan can develop these abilities progressively, although the amount of improvement depends on experience, garment complexity and practice quality.
Start with measurement rather than advanced drafting. A complex pattern can be accurately drawn and sewn yet still fit poorly if the starting measurements or intended ease are misunderstood.
Take body measurements consistently, using the positions relevant to the garment being made. Compare them with the pattern company’s sizing information and, where available, the finished garment measurements.
Remember that a finished garment measurement includes intended ease. Measuring the paper without accounting for seam allowances, darts or pleats can lead to an incorrect conclusion about fit.
The next priority is learning to identify which measurement controls the problem. A garment that feels tight across the upper back may require an adjustment different from one that is simply too small around the bust.
For complex patterns, notch reading, grainline discipline and cross-seam alignment deserve early attention because multiple panels must work together accurately.
The following four-week progression is a proposed practice schedule, not an experimentally validated training programme.
| Week | Main skill | Practical exercise and outcome |
|---|---|---|
| Week 1 | Read and measure a pattern flat. | Take body measurements, identify relevant finished dimensions, account for ease and annotate one working pattern copy. |
| Week 2 | Make one targeted fitting adjustment. | Construct a relevant toile section, diagnose one fitting issue and test a single alteration. |
| Week 3 | Transfer alterations accurately. | Record the confirmed correction on paper, redraw affected seamlines and check that neighbouring pieces still match. |
| Week 4 | Apply the complete workflow. | Make a garment using verified measurements, cutting marks, grainlines and fitting checkpoints. |
The fastest observable improvement may come from preventing an unsuitable size choice or recognising a cutting-layout error before it becomes permanent. More advanced drafting methods, such as slash-and-spread alterations or grading, become useful once the underlying measurement and fitting principles are understood.
At the end of each project, compare the intended result with the actual garment. Record which measurements were accurate, which alterations worked and which construction stages created difficulty.
Do not judge progress solely by the number of completed garments. A well-documented toile and a corrected reusable pattern can provide more practical learning than repeatedly sewing a garment without understanding its fit problems.
For your next advanced garment, choose one manageable pattern, measure it carefully, test its uncertain areas and document the changes before cutting the final fabric. Repeating this controlled process builds useful pattern-making judgement while limiting avoidable material waste.
Should I cut directly into an expensive fabric if I have used the pattern before?
A previously successful pattern provides useful fitting information, but check whether the new fabric behaves similarly to the original. Differences in stretch, weight or drape may affect the result. Confirm the pattern’s measurements and grainline requirements, and consider a selective test if the new material or garment variation introduces uncertainty.
Can I use an old bedsheet instead of buying calico for a toile?
An old bedsheet may be suitable for a woven toile when its stability, weight and drape are sufficiently similar to the intended fabric. It may be less useful for testing fluid materials or stretch garments. Judge the substitute by how it behaves, not simply by its low cost.
Should seam allowances be included when measuring paper pattern pieces?
No. To assess a garment’s finished dimensions, measure between the relevant seamlines rather than using the outer cutting edges. Account for darts, pleats, tucks and any other shaping that affects the finished measurement. Compare the result with your body measurements while allowing for the design’s intended ease.
What should I do if two curved pattern pieces appear to have different edge lengths?
First check that the pieces belong to the same size and garment view. Compare their stitching lines, not just their cut edges, and locate any notches or easing instructions. Curved seam allowances may differ visually even when the stitching lines correspond. Do not trim either piece until you understand the intended construction.
How can I preserve tissue patterns after making fitting alterations?
Trace the original pattern onto suitable paper before making significant changes. Mark the pattern name, size, grainlines, notches and alteration details on the working copy. Keep the original intact and store the revised pieces together with fitting notes so the successful adjustments can be repeated.